
Build your own furniture from particleboard — from project to assembly
Survey, project, part list, cutting, edge banding, drilling, assembly — seven steps, and every one of them is a chance to be two millimetres out. Here is the whole route, and what gets calculated for you along the way.
Building furniture yourself starts with arithmetic, not with a saw. A particleboard carcass is a dozen or so rectangles that have to agree to the millimetre: board thickness eats into the internal dimension, edge banding adds its own fractions, and the blade removes material at every cut. Get one of them wrong and nothing fits.
The good news is that none of this has to be worked out by hand any more. Below is the whole route from survey to assembly, with which numbers you set and which ones recalculate themselves.
What you actually need
The list is shorter than it looks. In practice you design and calculate yourself, then order the cutting and edge banding from a workshop — a panel saw and an edgebander are not things you replace at home.
- A project with dimensions. Carcass, shelves, fronts, clearances. Everything else follows from it.
- A part list. Length, width, quantity, material — this is what goes to the workshop.
- A cutting map. How the parts sit on the sheet and how many sheets to buy.
- Edge banding and drilling plan. Which edges get banded and where the holes go.
- Hardware. Confirmats, hinges, shelf supports, runners, legs and handles — from the schedule, not by guesswork.
For tools at home you need a screwdriver, a square, a tape measure and a hex key for the confirmats. The workshop does the rest.
Seven steps, start to finish
The order is the same for a bedside cabinet and for a wardrobe. You can skip a step — it will simply surface later, and more expensively.
Measure the opening at three heights — top, middle, bottom — and take the smallest. Walls are almost never parallel, and a carcass built to a single measurement will not go in.
Build the carcass in the designer: overall size, bays, shelves, fronts. No drafting skill is needed — a template drops in a finished frame and you adjust the dimensions.
The project turns into a list of parts with sizes and quantities. The same list can be typed by hand if there is no 3D project: length, width, quantity, name.
Parts are laid out across sheets with the saw kerf and edge margins taken into account. Out comes the cutting map and the number of sheets to buy.
You mark which edges are visible and assign banding to them. The total length per type is summed for you — that is the figure you order by.
Holes for confirmats, hinges and shelf supports. Either the workshop machines them from your plan, or you drill them yourself from the marked coordinates.
Box first — sides, bottom, top — then the back panel, which squares the carcass up. Shelves and fronts last.
The part list: from the project or by hand
If the project is already built in 3D, the parts come across on their own. If not, the list is typed with quick entry: length, width, quantity, name, and Enter adds the row. One project holds up to 200 parts, which covers a whole kitchen.
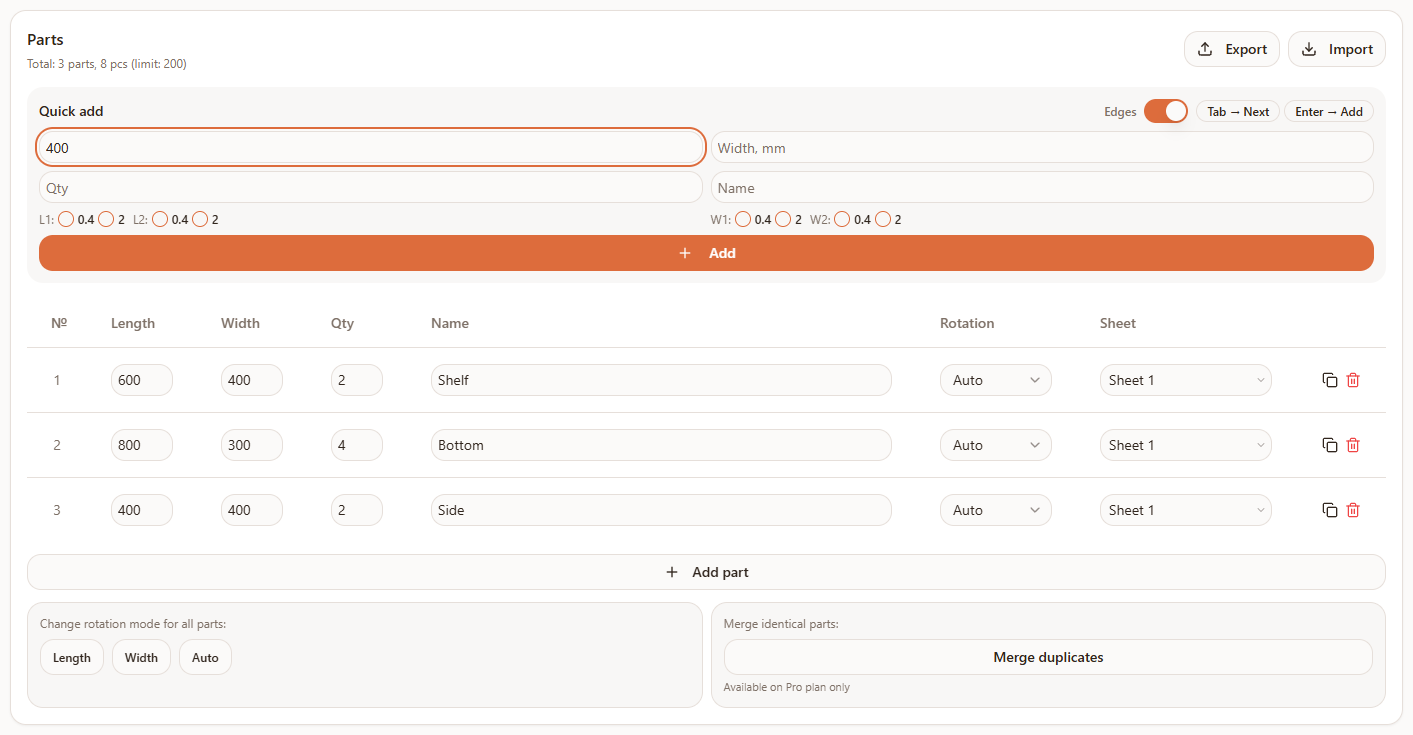
The rotation column decides what happens to the grain. «Auto» lets a part turn for a tighter layout; «Length» and «Width» lock the direction. Fix the direction on fronts and visible side panels; leave it free on internal shelves, where saving material matters more than the pattern.
The three numbers people forget
- Board thickness. The internal width is the overall width minus two side panels. At 16 mm board, an 800 mm carcass is 768 inside — and the shelf has to be exactly that.
- Banding thickness. A part with 2 mm banding on two sides grows by 4 mm. Either subtract it yourself or switch on automatic edge deduction during layout.
- Saw kerf. The blade removes material between parts — 3 mm by default. Across a couple of dozen cuts that is centimetres the last part will be missing.
Hardware comes from the same schedule: confirmats, Ø35 cup hinges, shelf supports, drawer runners, adjustable legs and handles, with quantities and lengths. That is your shopping list.
Getting the cutting map
A cutting map is a diagram of the sheet with the parts laid out and the cut lines drawn. You do not draw it — you get it: enter the sheets and parts, set the kerf and the edge margin, run the calculation. The map then goes to the workshop as a PDF and the schedule as a spreadsheet.
Enter any offcuts left from earlier projects: the algorithm consumes them first and only then reaches for a new sheet. That is the most common way to lose money for people who are not building their first piece.
Edge banding and drilling: what to order
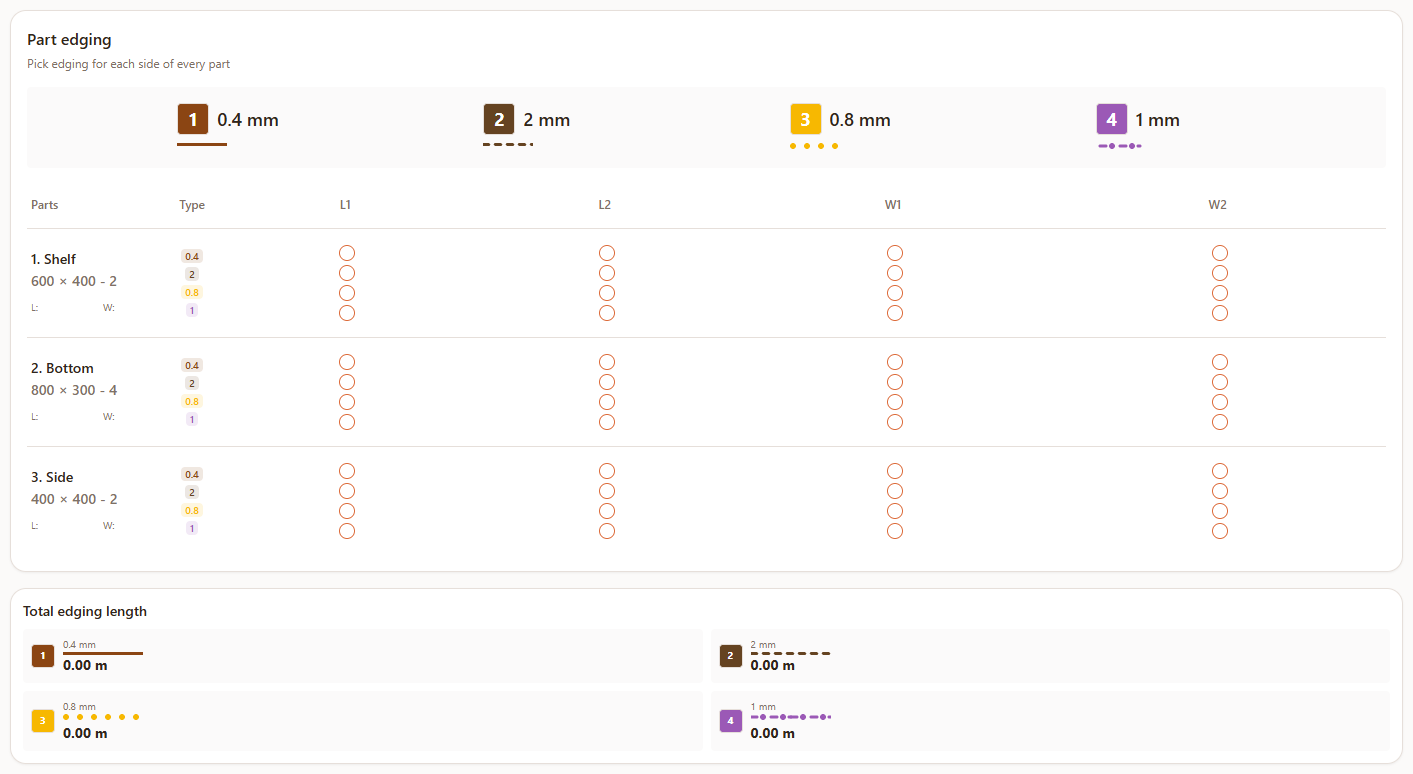
Banding is assigned per side of a part — the two long edges and the two short ones. One type per side: thick 2 mm on visible edges and fronts, thin 0.4 mm inside. The total length is summed per type, and that is the number you give the workshop.
Drillings are the holes for the hardware: hinge cup, confirmat into the face or the edge, shelf support, minifix, rafix, dowel. Each has X and Y coordinates, a diameter and a depth, plus a through-hole flag. A depth greater than the part thickness is trimmed automatically.
Five beginner mistakes
- Measuring in one place. Openings are hardly ever square. Measure at three points, take the minimum, allow a clearance.
- A shelf cut to the exact internal size. If the internal width is 768 and the shelf is 768, it will not go in. A couple of millimetres of clearance is mandatory.
- Banding not subtracted from the sizes. The most expensive mistake: the parts arrive correct and the carcass assembles under tension.
- Offcuts left out of the project. The material is in the garage and the layout buys a new sheet.
- Back panel «later». It holds the geometry. Without it the carcass racks and the front gaps stop matching.
Read next
Related material and step-by-step guides.
It all starts with a project — and the project is free to build.
Browse ready projectsFrequently asked questions
How do I make a furniture project if I cannot draw?
You do not draw. A template drops in a finished carcass — wardrobe, chest of drawers, shelving, desk — and you adjust the overall size and the number of bays. Parts, their sizes and quantities recalculate on every edit.
What tools do I need?
For assembly, a screwdriver, a square, a tape measure and a hex key. Cutting and banding are ordered from a workshop: cutting particleboard squarely at home and applying banding neatly without a machine is close to impossible.
What board thickness should I use?
Carcasses and shelves usually take the thicker board, back panels a thin hardboard or MDF. The exact thicknesses depend on the brand you choose — each has its own catalogue, and the project picks the thickness from it rather than guessing.
Can I do all the calculations for free?
Yes: building the project, the part list, edge banding and hardware calculation, cutting in two modes and export to PDF and Excel are all on the free plan. The Optimal cutting mode, DXF export and label printing belong to Pro.
What exactly goes to the workshop?
The cutting map as a PDF, the parts schedule as a spreadsheet and the drilling plan. A CNC shop will also want the DXF. That set is enough for the order to be accepted without questions.
Is building it yourself actually cheaper?
The saving is on design and assembly — material, cutting, banding and hardware cost the same for you as for a cabinetmaker. How big the difference is depends on your region and the complexity of the carcass, so it is only worth working out against a specific quote.
Building furniture from particleboard is not about joinery skill — it is about being careful with numbers. The software handles the project and the maths, the workshop cuts and bands, and what is left on your side is the survey, sensible clearances and a screwdriver.