
Creating a cutting project
How to create a cutting project, set the kerf width and edge margins, choose the offcut priority, default edging and drillings, save the project and share it.
What this page is
A cutting project is a seven-step wizard where you set the cutting settings, add sheet materials and parts, and end up with a cutting map: how many sheets you'll need and how the parts fit on them. You can enter part sizes by hand, without a 3D furniture model — for a project made of particleboard, MDF, plywood, or any other sheet material.
When to use it
- To calculate a cutting layout from your own part sizes, without the 3D furniture designer.
- To find out in advance how many sheets of material you'll need and how much will be wasted.
- To continue an unfinished cutting project or make a copy of an already completed calculation for a new order.
Where it is
Bottom navigation bar → "+" button → "Cutting"
You can open an already started cutting project from the "My projects" page.
How to use it
A menu opens with three ways to create a project: "Design", "Sketch", and "Cutting".
The wizard opens on the first step, "Parameters"; the project is named "New project" — you can rename it when you save.
The "Next" button at the bottom right moves to the next step of the wizard; the "Back" button on the left returns to the previous one.
The thickness of the saw or router cut, subtracted between neighboring parts; 3 mm by default, from 0 to 10 mm.
How far parts stay from every edge of the sheet; 10 mm by default, from 0 to 100 mm.
Instead of one shared margin, four separate fields appear — one for each side of the sheet (W1, L1, W2, L2).
"Use offcuts first" (default) — the algorithm fills existing offcuts before anything else; "Use new sheets first" — keeps offcuts in reserve instead.
Two types named "Edge band" with different thicknesses exist by default — rename them as needed; the Pro plan unlocks up to 4 types.
If it's off, the "Drillings" step is hidden from the wizard and no fastener holes are added to the project; it's on by default.
"Hinges (cup Ø35)" and "Confirmats" — both checked by default.
The button briefly shows "Saving…", then "Saved ✓".
This button is only visible on the first step, "Parameters"; on other steps the same spot shows "Back" instead — return to the first step to exit. A "Leave project" dialog appears with "Save and exit" / "Don't save" / "Continue".
Only available once the project has been saved — it copies a view-only link; the recipient opens the cutting layout in a browser in view mode, without installing anything.
Interface overview
The wizard screen has a step switcher on top, the current step's panel in the middle, and an action bar at the bottom.
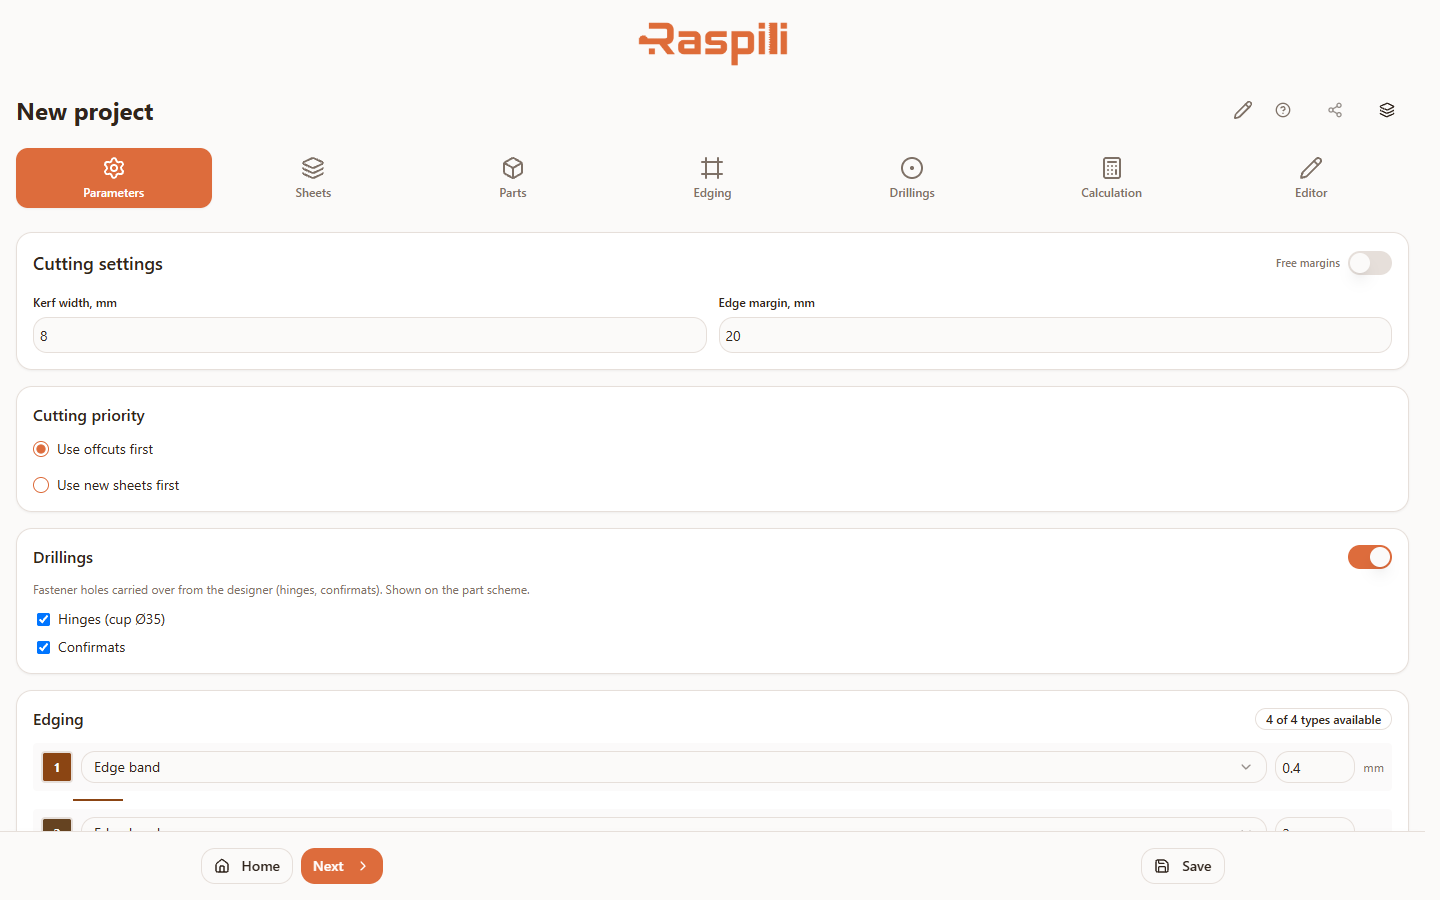
Step switcher
Seven wizard steps, open in any order (except "Drillings" if that step is disabled in the parameters).

- 1"Parameters" — kerf width, margins, priority, default edging and drillings, comment.
- 2"Sheets" — materials and offcuts the layout is built from.
- 3"Parts" — the list of parts with sizes and quantities.
- 4"Edging" — which edging type goes on which side of a part.
- 5"Drillings" — fastener holes and grooves; hidden if drillings are turned off in the parameters.
- 6"Calculation" — pick a cutting mode and run the calculation, see the results, and export.
- 7"Editor" — the visual cutting map, with manual adjustments available.
The "Parameters" step
Shared cutting settings that apply to the whole project.
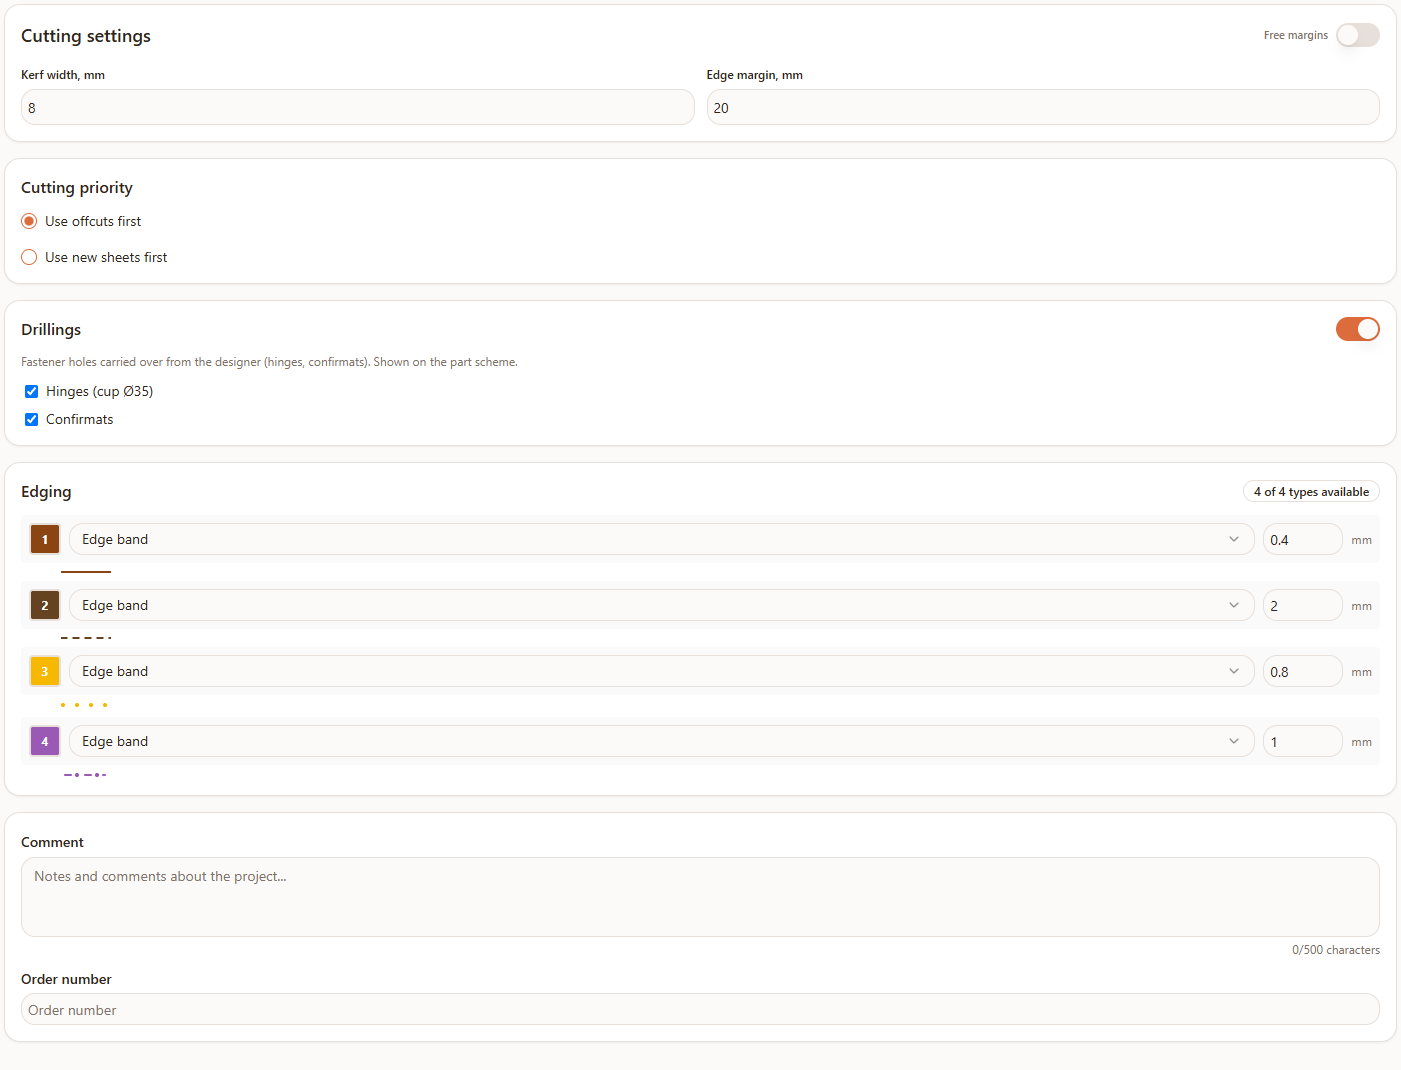
- 1"Kerf width, mm" — the thickness of the tool's cut; from 0 to 10 mm, 3 mm by default.
- 2"Edge margin, mm" — the margin from every edge of the sheet; from 0 to 100 mm, 10 mm by default.
- 3"Free margins" — switches to four separate margins, one per side of the sheet, instead of one shared value.
- 4"Cutting priority" — "Use offcuts first" (default) or "Use new sheets first".
- 5"Drillings" — switches the matching wizard step on or off; when on, shows the "Hinges (cup Ø35)" and "Confirmats" checkboxes.
- 6"Edging" — up to 2 types on the free plan, up to 4 on Pro; each has its own name (Edge band, Postform, or Custom), thickness in mm, and its own line style on the diagram (solid, dashed, dotted, dash-dot).
- 7"Comment" — free-text note for the project, up to 500 characters, with a counter.
- 8"Order number" — a field for the order number; editable with a Pro subscription, shown with a Pro badge on the free plan.
The project name bar
At the very top of the screen, above the step switcher — visible in the screenshot above.
| Element | What it does |
|---|---|
| Name field + pencil icon | Renames the project — click it and type a new name. |
| "?" icon | Opens a short guided tour, "How to use cutting". |
| "Share" icon | Copies a view-only project link; disabled with the tooltip "Save the project before sharing" until the project has been saved at least once. |
| "Layers" icon | Opens the "My projects" page — the list of all your projects. |
The bottom action bar
Fixed at the bottom of the screen on every wizard step.

| Button | Where it's shown | What it does |
|---|---|---|
| "Home" | Only on the "Parameters" step | Opens the "Leave project" dialog. |
| "Back" | On every step except "Parameters" | Returns to the previous wizard step. |
| "Design" | Only if the project was created from the 3D designer | Opens the linked 3D furniture scene. |
| "Next" / "Calculate" | On every step except "Calculation" / after calculating | Moves to the next step; on the "Calculation" step, before the first run, it starts the cutting calculation instead. |
| "Create a copy" | When viewing someone else's project | Saves your own editable copy of the project. |
| "Save" / "Saved ✓" / "Home" | Bottom right, in place of "Create a copy" | Saves unsaved changes; once there's nothing left to save, the button turns into an instant exit with no dialog. |
The "Leave project" dialog appears when you tap "Home" on the first step.
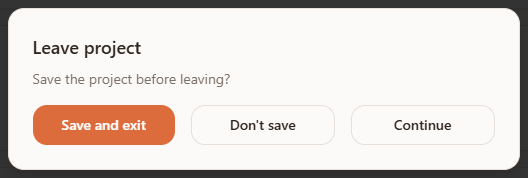
- 1"Save and exit" — saves your changes and returns to the home screen.
- 2"Don't save" — exits without saving; your latest changes will be lost.
- 3"Continue" — closes the dialog and returns to the wizard, changing nothing.
After tapping "Share" on a saved project, Raspili shows a brief confirmation toast.
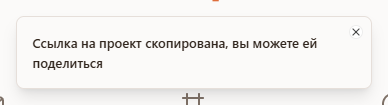
Note: this particular message is shown in Russian even when the app interface is set to English — a small localization gap on Raspili's side, not a mistake in your settings. Paste the copied link into a message or email — the recipient opens the project in a browser in view mode, without installing anything.
Possible errors
| What you see | Why it happens | How to fix it |
|---|---|---|
| "Project limit reached ({{current}}/{{limit}}). Available on the Pro plan." | The free plan allows only 1 cutting project by default | Delete an unused project on the "My projects" page, or upgrade to Pro — see the "Pricing and Pro subscription" article for details. |
| "Kerf width cannot be more than 10 mm" / "...less than 0 mm" | The value entered is out of the allowed range | Enter a kerf width between 0 and 10 mm. |
| "Edge margin cannot be more than 100 mm" / "...less than 0 mm" | The value entered is out of the allowed range | Enter a margin between 0 and 100 mm. |
| "Value must be a number" | The kerf-width or margin field contains something other than digits | Leave only a number in the field, with no letters or extra characters. |
| The "Order number" field can't be edited, with a Pro badge next to it | This is a Pro subscription feature | Upgrade to Pro, or leave the field empty — it doesn't affect the cutting calculation. |
| The "Share" button is disabled, tooltip "Save the project before sharing" | The project hasn't been saved yet | Tap "Save" — then "Share" becomes available again. |
Tips
- Set your parameters once, in your profile — then the default kerf width, margin, and edging get applied to every new project automatically, without re-entering them.
- Don't turn off "Drillings" too early — if fastener positions are already marked, turning it off just hides the step from the wizard; the data isn't deleted and the step can be turned back on.
- Save the project before sharing a link — the "Share" button stays disabled until you do.
- Leave "Use offcuts first" turned on — it's the default for a reason, and it keeps fewer unused material scraps.
Frequently asked questions
Can I create a cutting project without a 3D furniture model?
Yes, that's the main scenario: parts and their sizes are entered by hand on the "Parts" step, no 3D designer required.
What happens if I turn off drillings in the parameters?
The "Drillings" step is hidden from the wizard, and no new fastener holes are added to the layout. Data entered earlier isn't deleted — you can bring it back by turning the switch on again.
What is "Cutting priority" for?
It decides what the algorithm fills first: existing offcuts ("Use offcuts first") or whole new sheets, keeping offcuts in reserve ("Use new sheets first").
Why can't I edit the "Order number" field?
It's a Pro subscription feature. On the free plan the field is visible but not editable, with a Pro badge next to it.
How do I exit the project if I'm not on the first step?
The exit button is only shown on the "Parameters" step. On other steps, the left slot shows "Back" — step back through the wizard until you reach "Parameters", then tap "Home".
Why is the "Share" button disabled?
The project hasn't been saved yet. Tap "Save" — after that, the link can be copied.
How many default edging types can I set?
2 on the free plan, up to 4 on Pro. Each one can have its own name and thickness.
What comes after setting up the parameters?
Move on to the "Sheets" step to add materials and offcuts for the cut — covered in detail in the "Sheets, parts, offcuts" article.